Wednesday, September 25, 2013

How To Make Russian River Pinot Noir

Pinot Noir grapes from our Turtle Vines vineyard in Sebastopol, California.

Check out my eBook, Health Begins in the Kitchen.
Follow Foods For Long Life on Facebook.

We've been really busy with harvest and making wine this month so I thought I'd write a little about this other part of my life, when I'm not creating recipes or writing my blog.

Five Fun Facts about Pinot Noir
1. Pinot Noir is the same as French Burgundy
2. The movie Sideways caused the consumption of Pinot Noir to increase and the consumption of Merlot to drop.
3. Pinot Noir is raw and vegan (if not filtered). Fermentation temperatures never get that hot.
4. Pinot is known as the Heartbreak Grape as it requires a lot of attention in every phase of the winemaking process. Andre Tchelistcheff, a famous winemaker, once said, "God made Cabernet Sauvignon, whereas the Devil made Pinot Noir."
5. Some of the best places to grow Pinot Noir are Burgundy France, Sonoma County in California, Willamette Valley in Oregon, Central Otago in New Zealand, Ahr region in Germany, and Northern Italy. 

From Silicon Valley to Russian River Valley
My husband Doug and I met 24 years ago in Silicon Valley where we both had stressful jobs in the high tech industry. Collectively we had spent over six decades in the world of engineering - sitting in meetings, working in laboratories or factories, or riding airplanes, never feeling the sun on our backs or breathing fresh air. For as long as we've been together, we talked about moving to the country and starting a vineyard. Five and a half years ago that dream came true.

We found the perfect spot in the small town of Sebastopol, about one hour north of San Francisco. The house needed quite a bit of remodeling and there was just a big empty field behind it which would be the future home of over 3,000 organic Pinot Noir vines. I don't think we realized at the time how much work it would take.


2009 - big empty field
2013 - vineyard before harvest with bird netting

Doug took viticulture and wine making classes at the Santa Rosa junior college. Only in Sonoma county would you find a JC with its own 70 acres of vines, professional wine making equipment, and professors with impressive experience in the wine industry. With the help of some really smart people, we took soil samples, designed the vineyard, selected the precise clones of Pinot Noir to plant, and planted 3,130 healthy little vines.

It took 4 years until our first harvest which yielded a little over one half ton of grapes. This year we harvested two and a half tons. Ultimately our little vineyard will yield over five tons, enough to make three hundred cases of wine. This year we sold two tons of grapes to a local winery that appreciates that our grapes are organic. We saved a half ton to make some wine. I thought it might be fun to show you how we do that!

              *                          *                           *

Pinot Noir
Raw Vegan, Gluten Free
[makes 1,800 glasses or 360 bottles]
Requirements: a whole bunch of expensive equipment and lots of patience

Ingredients:
1/2 ton ripe Pinot noir grapes
100 pounds of dry ice, divided
120 ppm metabisulfate, (more or less) divided 
tartaric acid, as needed
300 g Go-Ferm yeast starter
50 g Assmanshausen or other wine yeast
2.5 g ML culture 

Step 1 - Picking the grapes:
Grapes are picked when their sugar content is around 24% (in wine lingo, that's called 24 brix). This is measured by placing grape juice from a carefully selected sample of grapes into a tool called a refractometer.


Refractometer used to measure brix

In addition to having the correct brix measurement, the seeds need to be nice and brown. Of course the final criteria for harvesting is that they taste great. The grapes are then picked early in the morning, while they are still cool, and placed in picking lugs that hold about 40 pounds of grapes.


Doug and a lug of grapes from our 2012 harvest.

Step 2 - Destemming the grapes:
Remove the grapes from their stems. (Some wine makers leave some of the grapes as full clusters). We use a piece of equipment called a destemmer to do this step.

The destemmer sits on top of a fermentation tank. It removes the stems from the grapes and the berries drop into the tank. If some of the stems fall through, make sure to pick them all out.


Doug pouring grapes into the destemmer.
My friends Lauren and John pulling out stems that fell through.

Step 3 - Cold soaking the grapes
To enhance the color and flavor of the wine, cold soak the grapes for five days. Big wineries do this with cooling coils around the tanks. We do it by placing dry ice in the fermentation tanks which makes it look like a witches cauldron! 


Using dry ice to cold soak the grapes.

To try and keep the grapes below 50 degrees F, stir in dry ice chunks every day. To prevent spoilage, add a small amount of metabisulfite (30ppm).

Step 4 - Analysis
While the grapes are cold soaking, send the juice out to a laboratory to determine its acid profile, pH, and final brix (hoping that the brix of the entire harvest matches that of your sample).

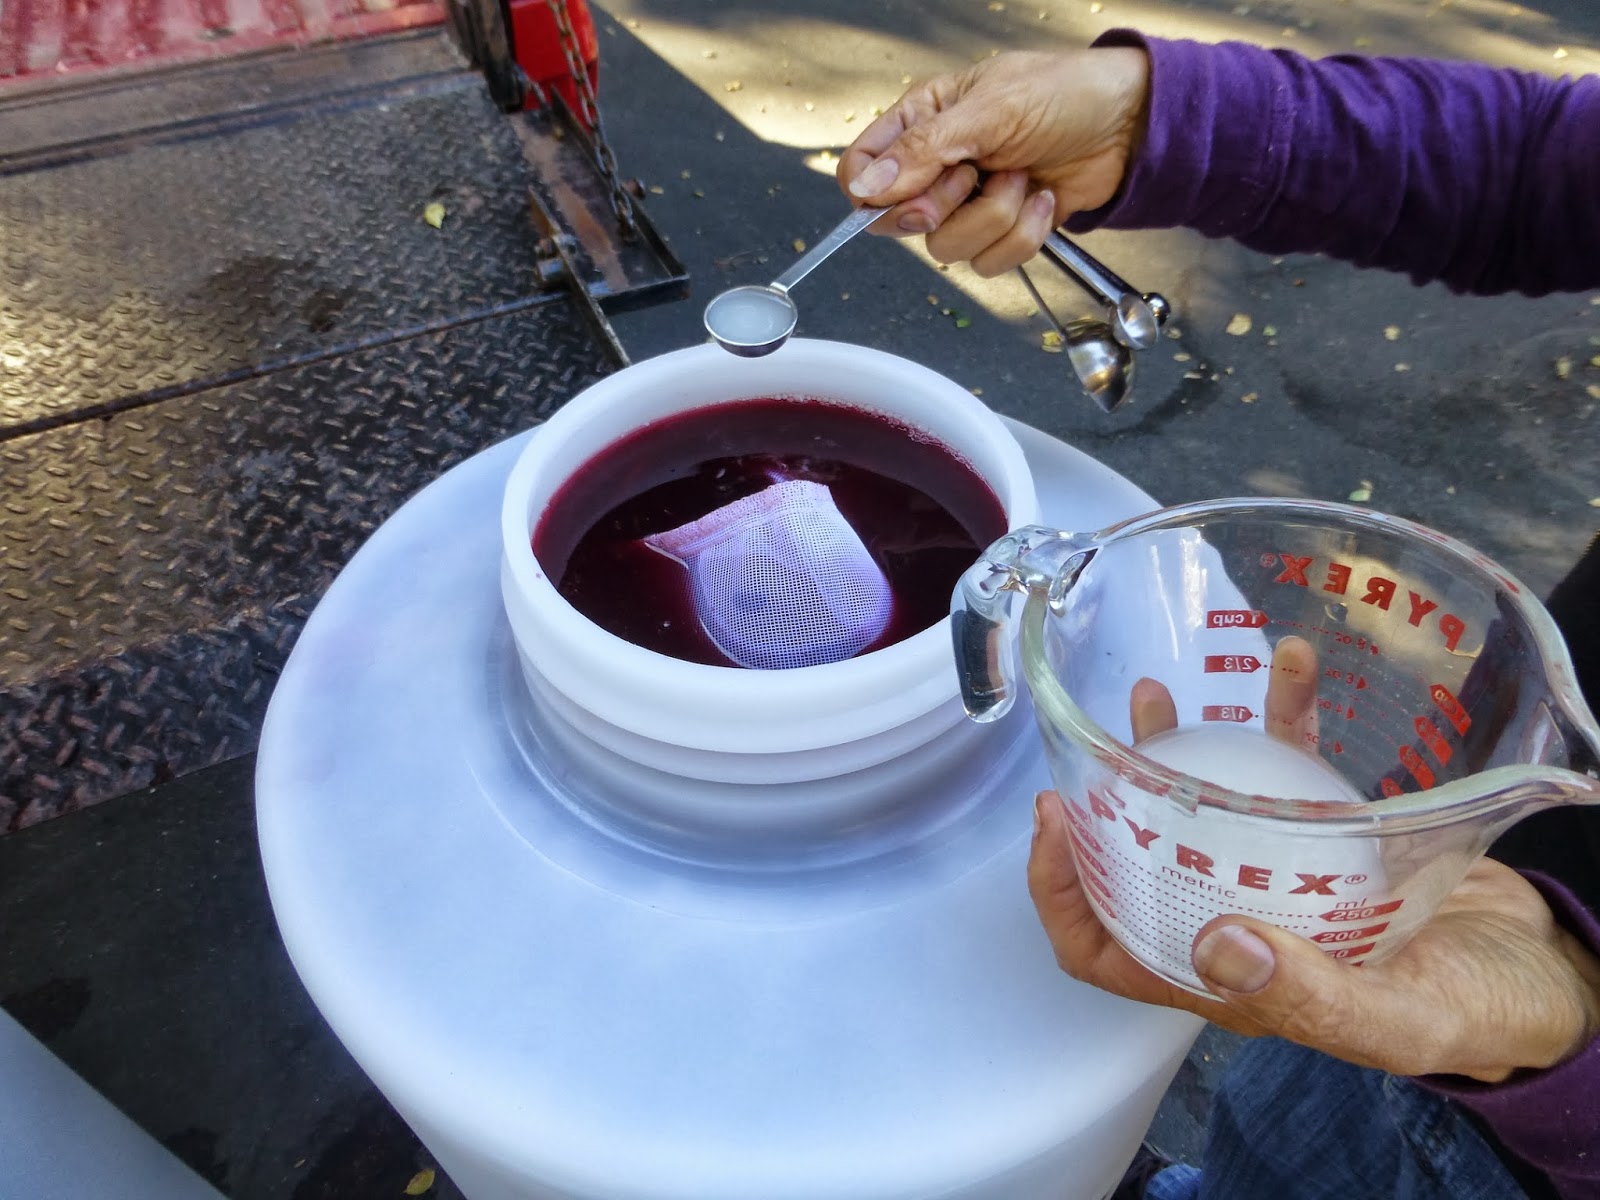
Step 5 - Adjust the acid
Pinot should have a TA, or titratable acid, of 0.7 to 0.75 grams per liter prior to fermentation. If it's lower than that, you need to add acid. Our TA was 0.55 so we stirred in some tartaric acid.


Adding tartaric acid.

Step 6 - Fermentation
Now for the good stuff - the conversion of the natural sugar in the grapes into alcohol.
For this you'll need two things:
* A type of yeast used for wine fermentation - we use Assmanshausen Yeast.
* Added nutrients to enhance fermentation - Go-Ferm Yeast Starter Nutrient

First, add the Go-Ferm to one quart of 110 degree F water. When the solution cools to 102 degrees F, add the yeast. Set the bucket of yeast, water, and Go-Ferm, into the  fermentation tank to chill the yeast. Once chilled to within 10 degrees of the grapes, add a little grape must (grapes/juice) into the bucket.


Bucket of yeast, Go-Ferm, and some grape must.

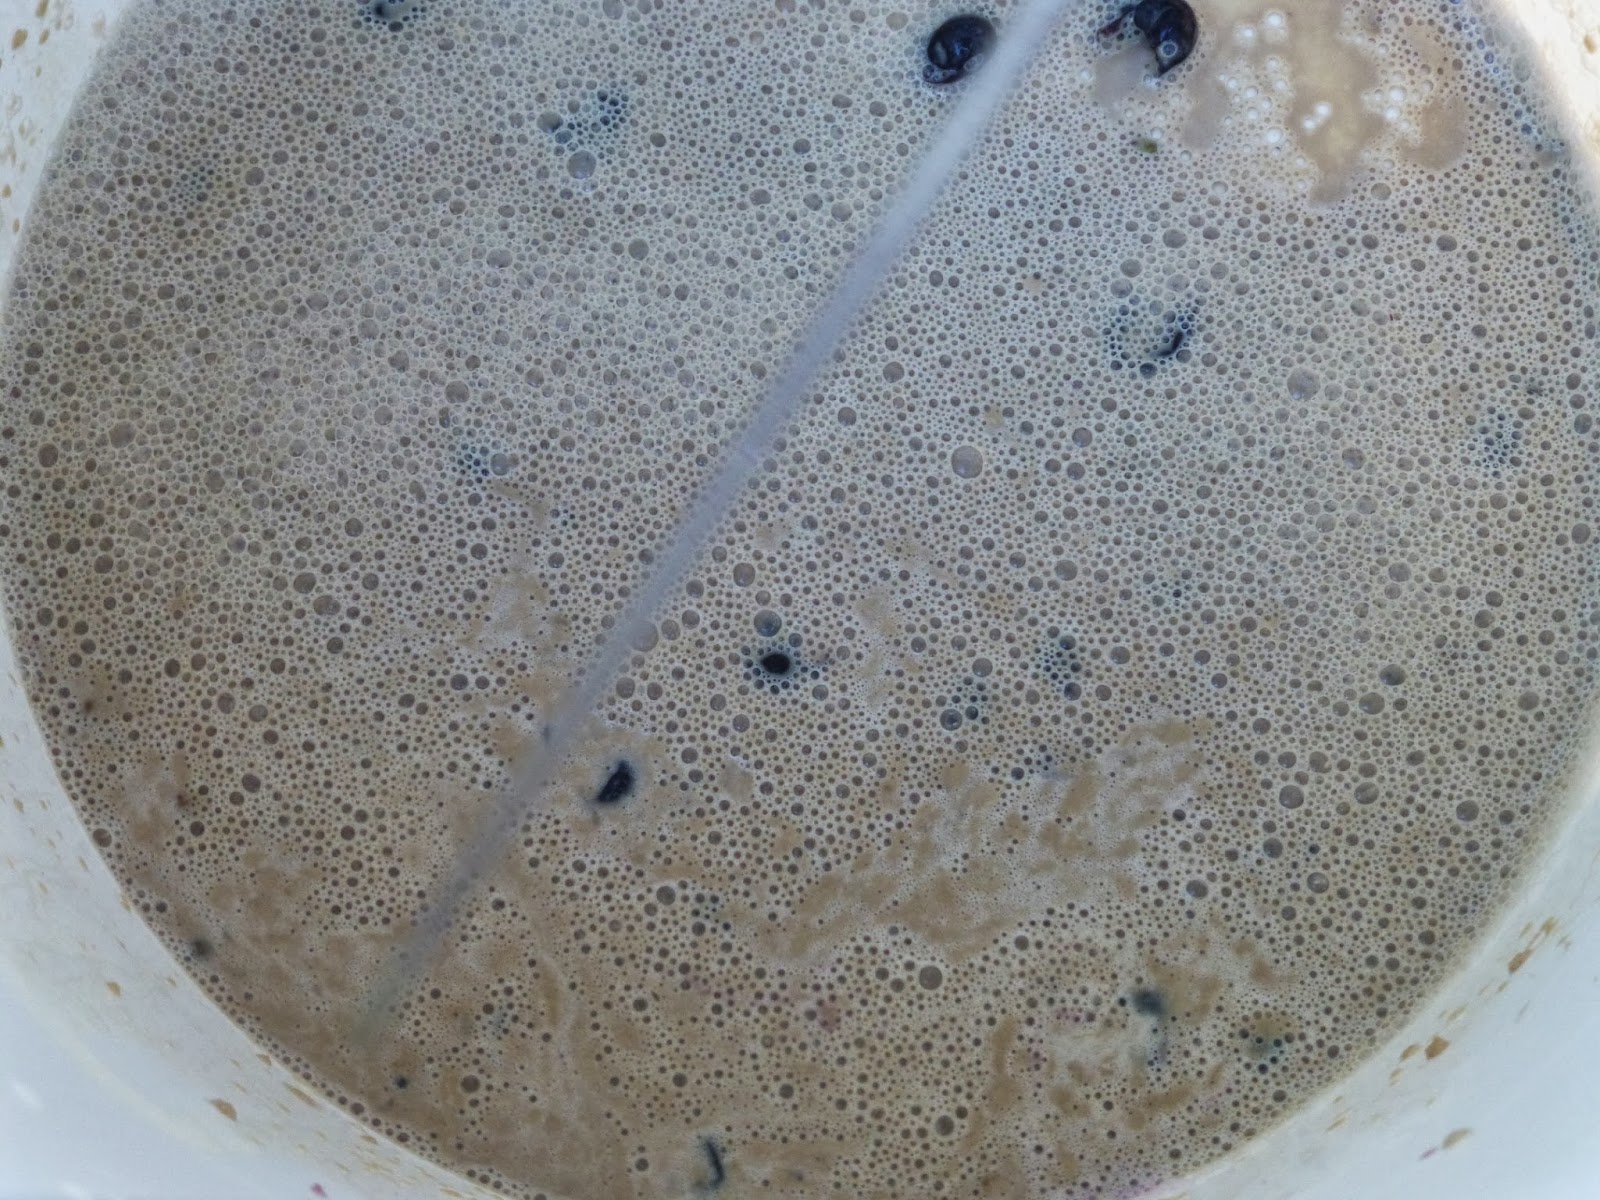
Spread the contents of the bucket over the top of the grape must. Leave as is, covered, for 24 hours in order for the yeast colonies to form.


The light streaks show the yeast solution.

After 24 hours, start punching down the top of the grapes to keep the skins incorporated into the juice. As fermentation continues, the skins will dry out and separate from the juice forming a thick cap over the fermentation tank. This cap must be punched down about twice a day during fermentation.


We use this stainless steel grape stomper to punch down.

Fermentation typically takes from 5 to 10 days. During punch down, measure the juice for its sugar content to see if the yeast are finished converting it to alcohol. A hydrometer is used for this measurement. When it hits zero, the grapes are ready to press.


The hydrometer looks like a long thermometer.
It floats in the juice - when it settles, the % sugar measurement can be read. 

Step 7 - Pressing the grapes
After fermentation, it's time to press. Since we have such a large amount of grapes, we purchased a bladder press. The bladder is in the center of the press and receives water pressure from an ordinary garden hose. When the bladder fills up, it gently squeezes the grapes and the juice pours out of the press. 


Bladder press

Place the pressed juice in a large container that has been sterilized. We used two forty gallon, food-grade containers. Let it sit for 24 to 48 hours.

Step 8 - Rack off the Gross Lees
After one or two days, sediment  will settle out of the wine. The heavy sediment that drops out in first day is called gross lees. Although some wine makers allow the wine to remain on the gross lees for an extended period of time, this could possibly introduce harsh flavors to the wine so many winemakers siphon the wine off of the gross lees into another vessel after one or two days. This is called racking. After racking, the wine is much purer with a small amount of fine lees that, unlike the gross lees, can be beneficial for the wine and becomes a source of nutrients for secondary or malolactic fermentation.

To rack the wine with a siphon, the pressed wine must be higher than the vessel you are racking into. We raised the pressed wine higher with the lift on the back of our pickup truck.

Step 9 - Malolactic Fermentation
Pinot noir grapes naturally contain three types of acid - tartaric, citric, and malic. To soften the harshness of malic acid, winemakers initiate Malolactic Fermentation (MLF), a process that turns malic into lactic acid (a softer acid that makes the wine more rounded and drinkable).

Prepare ML bacterial culture. Add 2.5 g of freeze-dried ML powder to 50 g of room temperature water or prepare according to directions. Add solution to racked wine.


Adding Oak during MLF
Adding oak during MLF allows the flavors to better integrate into the wine. Since we do not use oak barrels, we use little oak balls. Yes, I know, oak barrels are romantic and traditional and most winemakers scoff at the thought of using oak adjuct, but hear me out.

Our environmentally friendly, polyethylene, oxygen permeable Flextank is equivalent to a neutral barrel and doesn't impart any flavors into the wine but it breathes. It also removes the risk of a barrel introducing funky flavors or pathogens. 
By adding oak balls, or Medium Plus Xoakers, we can select the exact oak flavors we desire.  
We did an experiment with 4 types of oak by making extractions (actually martinis). After soaking them for several weeks in vodka, we observed the aromas from each solution and selected the one we liked the most. For us, that was medium plus toasted French oak.


Medium Plus Xoakers
How we selected our oak.

Add oak Xoakers to the vessel containing the racked wine.

Place oak balls into Flextank containing racked wine.

Add the ML bacterial culture to the vessel.

Adding ML solution.

Notice that the vessel is filled fairly high to minimize exposure to oxygen. 
Malolactic fermentation will begin as soon as the bacterial culture is introduced to the wine. 
Stir the wine gently once or twice a week during the fermentation period to get the light lees from the bottom of the tank back into the solution.

Test the wine after about 4 weeks to see if the fermentation is complete. 
Once finished, add sulfur to arrest any harmful bacteria. The amount of sulfur will vary with the pH of the wine.

Remove oak Xoakers.

Step 10 - Aging
Pinot can age from 12 to 18 months. Keep your barrel or tank in a cool temperature, around 55 to 60 degrees F.

Wine aging 

Step 11 - Bottling
Check the pH and TA. If needed, it can be corrected before bottling by adding up to .4 g/l of tartaric acid.

Do one final racking to remove the remaining sediment.

Here's an example of a small bottling machine. It's so easy, even a child can do it!

This was taken years ago at a friend's house - bottling Rose.

Let the bottled wine sit for at least 3 months or it may taste bad. This is called "Bottle Shock." There's a great movie by that name that explains this phenomena.

Step 12 - Drink it!
From harvest to opening a bottle of Pinot takes 18 to 24 months. So sit back and enjoy it. 


I left some details out but I hope this gave you an idea of how we make our Pinot noir.
Salute!

For more information on growing and making Pinot noir, you can follow Doug's blog about our vineyard, Turtle Vines

Tuesday, September 17, 2013

Romano Green Bean And Garbanzo Bean Salad With Basil Pumpkin Seed Pesto And Cherry Tomatoes - Vegan And Gluten Free

Romano beans are an Italian snap bean.

Check out my eBook, Health Begins in the Kitchen.
Follow Foods For Long Life on Facebook.

Romano Beans
If your garden is still producing beans, cherry tomatoes, and basil, here's a salad that I think you'll enjoy!

Romano beans are my favorites. They are Italian snap beans. If you can't find them in the grocery store, try the farmers' market. They are fun and easy to grow too. You can use any kind of green bean in this salad so if you don't have access to Romano beans, just substitute what you have.


Romano green beans

Pesto
Making pesto is a great way to use up that garden basil while you still have it. At the end of the summer, I like to make lots of pesto and I freeze it in 1/2 cup servings. It freezes well, especially when you make it with lemon juice (which I always do) which allows it to keep its color. I use cold-pressed hemp oil when making pesto for a salad and extra virgin olive oil if it's going into a cooked dish. Hemp oil should never be used for cooking as it will destroy the heat-sensitve omega-3 fatty acids.

     *                        *                         *            

Romano and Garbanzo Bean Salad with Pesto and Cherry Tomatoes
Vegan, Gluten Free
[makes 6 servings]
Requires a food processor

For the pesto
1 large clove of garlic
1 packed cup fresh basil
1 heaping tablespoon Red Star nutritional yeast
2 tablespoons raw, shelled pumpkin seeds
2 tablespoons cold pressed hemp oil or extra virgin olive oil
1 tablespoon freshly squeezed lemon juice
1/4 teaspoon salt or to taste

For the salad
1 pound Romano or other type green bean
1 (15 oz) can no salt added garbanzo beans, rinsed and drained
1 1/2 cups cherry tomatoes
1/2 cup pesto (above)
Salt and black pepper to taste

Run the garlic through the chute of the food processor. Add the basil, nutritional yeast, pumpkin seeds, oil, lemon juice, and salt and process until almost smooth. Set aside.


Pesto ingredients
Processed pesto

Prepare the green beans. Trim the ends and cut in half. Steam until just fork tender, about 5 to 10 minutes. Test occasionally to prevent overcooking.

If the cherry tomatoes are large, cut them in half.

Place cooked green beans, garbanzo beans, cherry tomatoes, and pesto in a large bowl and toss until well combined. Season with salt and freshly ground black pepper to taste and serve.


Toss in a large bowl.

Per serving: 176 calories, 7 g total fat, 0.7 g saturated fat, 724 mg omega-3 and 2,636 g omega-6 fatty acids*, 7 g protein, 25 g carbohydrates, 7 g dietary fiber, and 113 mg of sodium**.

*Essential fatty acids do not include any contribution from the nutritional yeast since that information is not available from the manufacturer. 

** The amount of sodium does not include the amount added "to taste". 


Thursday, September 12, 2013

Vegan Bell Peppers Stuffed With Orzo, Mushrooms, and Kalamata Olives

Whole wheat orzo makes a nice stuffing for these bell peppers.
There are several gluten-free brands of orzo too.

Check out my eBook, Health Begins in the Kitchen!

It's been a busy 2 days for Doug and I. We harvested over two and a half tons of Pinot noir on our organic vineyard here in Sebastopol. Knowing how little time and energy I'd have to cook after picking all these grapes, I made these stuffed peppers ahead of time for our meals. So if you're looking for a dish to make on Sunday and cook during the work week, try this one out!


Make-ahead meals are important when you
have a busy work week ahead of you!

         *                               *                                *

Orzo Stuffed Bell Peppers
Vegan, gluten free (with gluten free orzo)
[makes 4 servings]
Requires an 8" x 8" x 4" casserole dish with cover

4 large red bell peppers (4 lobes, 1/2 pound each)
1/2 pound whole wheat or gluten-free orzo
1 tablespoon extra virgin olive oil
1 cup diced onion
2 cloves garlic, minced
1/4 pound crimini mushrooms
1/4 teaspoon black pepper, or to taste
3 medium tomatoes, diced or one (15 oz) can diced tomatoes
1/4 packed cup chopped fresh basil
8 pitted kalamata olives, thinly sliced
1/2 cup Daiya mozzarella shreds*
1/4 teaspoon salt, or to taste

* non-vegans can substitute low-fat mozzarella


Preheat oven to 350 degrees F.

Prepare the peppers. Select big, square peppers with 4 lobes on the bottom so that they will stand up nicely in the casserole dish. 


Square peppers with 4 lobes.

Fill a medium size pot with water and bring to a boil. You will be using this same pot for blanching the peppers, cooking the pasta, and preparing the filling. I hate dirtying too many pots!

Cut the tops off the peppers and remove the seeds. Boil, two at a time, for 2 minutes. Remove the peppers, leaving the boiling water in the pot. Drain the peppers well, and place in the deep casserole dish.


Place hollow, blanched peppers in deep casserole dish.

Bring the water back to a boil, add salt, and cook orzo according to directions. Make al dente.

Drain the orzo, rinse, and set aside. Dry the pot with a towel.

Heat olive oil in the pot and cook the onions for 3 minutes. Add garlic and cook one minute. Add mushrooms and cook, stirring frequently, until they soften and release moisture, about 5 minutes. Season with black pepper to taste.


Add tomatoes, basil, and kalamata olives to the pot with 1/4 cup of water and stir. If you are using a can of diced tomatoes instead of fresh tomatoes, you do not need to add water. Cook   for a few minutes.


Stir in orzo and mozzarella "cheese." Add salt if needed.


Stuff the peppers with the orzo mixture. You may cover and refrigerate at this point or add 1/2 cup of water to the bottom of the casserole dish, cover and bake in preheated oven until hot and bubbly, about 45 minutes. 


Remove from the oven and serve.


Each stuffed pepper provides 11 grams of protein
and 12 grams of dietary fiber!


Per serving: 375 calories, 9 g total fat, 1.5 g saturated fat, 101 mg omega-3 and 892 mg omega-6 fatty acids*, 0 mg cholesterol, 11 g protein, 103 g carbohydrates, 12 g dietary fiber, and 425 mg sodium.

* Essential fatty acids do not include any contribution from Daiya mozzarella shreds since that information is not available from the manufacturer.


For more delicious recipes, peek inside my eBook, Health Begins in the Kitchen.


Monday, September 09, 2013

Raw Vegan Hemp Powder Delivers Protein, Omega-3, And Fiber - Great For Smoothies!

Looking for protein, omega-3 and fiber? Try this!

Follow Foods For Long Life on FACEBOOK.

Hemp
For those who follow my blog, you already know that I LOVE hemp - read last year's post, Why hemp should be part of your diet.  Hemp seeds are one of the three Omega-3 Power Seeds (the other two being flax and chia seeds.) 

I recently discovered a new raw vegan product by Manitoba Harvest Hemp Foods. It's called Hemp Pro Fiber. It 's not only a great source of high quality protein, but it also provides essential fatty acids as well as fiber - all critical nutrients in our diet.


Per Serving
Each quarter cup serving of Hemp Pro Fiber contains:
130 calories
11 grams protein
13 grams dietary fiber
14 grams carbohydrates
4 grams total fat / 0.5 grams saturated fat

Essential fatty acids:
   600 mg omega-3
   2100 mg omega-6
   300 mg omega-9

It also provides 35% of the daily requirement of iron.

Hemp is a Complete Protein 
Here is the Amino Acid Profile per serving:
Aspartic acid - 969 mg 
Threonine - 333 mg
Serine - 450 mg
Glutamic Acid - 1550 mg
Proline - 375 mg
Glycine - 414 mg
Alanine - 411 mg
Valine - 462 mg
Isoleucine - 381 mg
Leucine - 621 mg
Tyrosine - 315 mg
Phenylalanine - 447 mg
Lysine - 321 mg
Histidine - 228 mg
Arginine - 1180 mg
Cystine - 122 mg
Methionine - 201 mg

How to Use
My favorite way to use this powder is to stir it into my morning smoothie.
I also stir some into my oatmeal or bake it into banana bread and muffins.


Here's what I made with it this morning!


Hemp Smoothie with fruit and kale

Hemp Smoothie with Grapes, Kale, Orange, and Pear
Raw Vegan, Gluten Free
Requires High Speed Blender
[makes 2 servings]

1 1/2 cups water or almond, hemp or other non-dairy milk 
1 pear, cored and cut into quarters
1 orange, peeled, seeds removed, and quartered
1 cup chopped kale, stems removed
1/4 cup Manitoba Harvest Hemp Pro Fiber
1 cup frozen red grapes

Place all ingredients into a high speed blender. Blend until smooth and serve.


Wednesday, September 04, 2013

Vegan Almond Polenta Cake

Almond polenta cake

Follow Foods For Long Life on FACEBOOK.

Polenta
Polenta, or cornmeal, may not be an ingredient that immediately comes to mind when baking a cake, but it adds a wonderful texture to this simple, low-calorie recipe. Dust with powdered sugar or with a scoop of vanilla Almond Dream non-dairy frozen dessert. 


Serve this cake with your favorite non-dairy ice cream.
Vanilla Almond Dream goes very well with this recipe.


         *                          *                          *                       *

Almond Polenta Cake
Vegan
[makes 12 servings]
Requires a 9 inch cake pan

2 tablespoons ground flax seeds
6 tablespoons water
1 1/2 cups King Arthur white whole wheat flour
1/2 cup organic (non-GMO) polenta
1 teaspoon baking soda
1 teaspoon aluminum-free baking powder
1/4 teaspoon salt
2 packets stevia
1/2 cup organic cane sugar
3/4 cup almond milk
2/3 cup apple sauce
1/4 cup extra virgin olive oil
1 teaspoon almond extract
1/4 cup sliced almonds

Preheat the oven to 350 degrees F.
Prepare the pan by greasing the sides with Earth Balance or olive oil and lining the bottom of the pan with wax paper, cut to fit.

Make a flax egg by combining the ground flax seeds and water in a small bowl or cup. Beat with a fork until the mixture becomes gooey. Set aside.

Combine the flour, polenta, baking soda, baking powder, salt, and stevia in a medium bowl. Mix well and set aside.

In a large bowl, mix the sugar with milk, apple sauce, oil, almond extract, and the flax egg. Mix well until thoroughly combined.

Add the dry ingredients and mix again until well blended. Pour into the prepared 9 inch baking pan.

Sprinkle almonds evenly over the top and bake until a toothpick inserted in the middle comes out clean, 32 to 36 minutes. Remove from the oven and place on a rack until fairly cool, about 30 minutes.


Sprinkle sliced almonds over batter and bake.

With a thin knife, carefully cut around the edges of the cake. Place a large round plate over the cake, turn over and release the cake into the plate. Peel off the wax paper.


Peel wax paper off the bottom.

After the wax paper is removed, place a large round serving plate over the cake and turn back over so that the almonds are visible. 


Slice and serve by itself or with a scoop of vanilla Almond Dream non-dairy frozen dessert.


Per serving: 171 calories, 6.5 g total fat, 1 g saturated fat, 308 mg omega-3 and 899 mg omega-6 fatty acids, 0 mg cholesterol, 3 g protein, 25 g carbohydrates, 2.5 g dietary fiber and 193 mg sodium.

For more delicious vegan and dairy-free desserts, check out my eBook, Health Begins in the Kitchen: Delicious and Easy Vegan Recipes and Seasonal Food Plan.