Monday, November 21, 2016

Healthy Instant Pot Thanksgiving Recipes

No Instant Pot? Download my eBook, Health Begins in the Kitchen, for vegan Thanksgiving Recipe ideas and Menus you can make without an Instant Pot.
Available on Amazon and iTunes.

Instant Pot - a Needed Helper for Holiday Cooking
If you're like most families, your oven and all the burners are busy when cooking for the holidays, especially on Thanksgiving. What better time to have an Instant Pot to lend a helping hand. I've got two!

Here are a few healthy, low-calorie Instant Pot recipes you might want to consider for your holiday meals. Except for the Farro recipe, they are also gluten free.

Start with Soup
I have two takes on soup. The first is one that's casual, served in a mug and handed to your guests in the kitchen while everyone is cooking. To do this, you need a brothy soup, like this Instant Pot Butternut Squash Soup that I blogged earlier this week.

At only 117 calories, this won't many calories to your meal.

Of course, the other take on soup is to serve it as a first course at the dinner table. One of my absolute favorite soups that I make in the Instant Pot is Vegan Split Pea Soup with Shredded Carrots. 


Popular Thanksgiving Side Dishes

For a healthier mashed potato recipe, try Mashed Vegan Yukon Gold Potatoes and Cauliflower. This dairy-free, Instant Pot version of mashed potatoes will be welcomed by your dairy sensitive guests and the cauliflower lightens up the calories. 

Only 135 calories and a whopping 5 grams of dietary fiber!

If you prefer sweet potatoes, make these Instant Pot Maple Whipped Sweet Potatoes.

150 calories and only 1 gram of fat
and a whopping 4 g of dietary fiber!

Brussels sprouts are a must at our Thanksgiving table. Clean them ahead of time and make Sweet and Orangey Brussels Sprouts in your Instant Pot in just a few minutes time.

Only 65 calories per serving

Another side dish that you can easily make in your Instant Pot is Farro with Peas. 


Greens always dress up a table. If you aren't making mashed potatoes, you can make this Instant Pot Kale and New Potato dish. Of course you can omit the potatoes and double the kale in the recipe if you already have potatoes on the menu.

Only 54 calories and 1 gram of fat

Well, that should give you a few ideas on how to use your Instant Pot for your holiday cooking. I haven't figured out how to make a pumpkin pie in there yet, but you should have plenty of room left to do that in your oven.

Happy Thanksgiving!


Tuesday, November 15, 2016

Instant Pot Butternut Squash Soup
Only 117 Calories Per Serving

This simple butternut squash soup is a
great first course for your holiday dinner.

Follow Foods For Long Life on Facebook and Pinterest.
For healthy, vegan holiday recipes, check out
my ebook, Health Begins in the Kitchen.

Quick and Easy Soup in the Instant Pot
With several dozen butternut squash from my harvest, I've been trying to create a really simple, delicious, and healthy recipe so that I can enjoy them over the next few months. This recipe, using my Instant Pot Pressure Cooker, makes a steamy, brothy soup that makes a wonderful beginning to any meal. I will be hauling a few of my squash to my daughter's house next week so that we can serve this soup on Thanksgiving day.

Butternut squash can sometimes be tough to cut and a bit intimidating, so check out my post, An Easy Way to Cut a Butternut Squash Without a Machete.

If you don't have an Instant Pot, follow the Stove Top recipe below.


                         *                                 *                                 *

Instant Pot Butternut Squash Soup
Vegan, Dairy and Gluten Free
[makes 6 servings]

Requirements
Instant Pot Pressure Cooker
Immersion Blender

Ingredients
1 tablespoon extra virgin olive oil
1 cup diced onion
1 cup diced celery
1 (2-pound) butternut squash, peeled, cleaned and diced
4 cups vegetable broth*
1/2 teaspoon salt, or to taste
1/2 cup unsweetened applesauce, room temperature
Pinch cayenne pepper, or to taste
1 teaspoon fresh thyme, chopped, divided
2 tablespoons freshly squeezed lemon juice, or to taste

* broth can be replaced by 4 cups water and a large Rapunzel vegan bouillon cube

Directions (Using an Instant Pot)
Heat the oil in the Instant Pot on the SAUTE function. Add the onions and celery and cook for three minutes, stirring frequently. Turn off the Instant Pot.

Add the diced butternut squash, broth, and salt and hit the MANUAL button on the Instant Pot and set for 6 minutes under high pressure. Make sure the quick release switch in the closed position. When done, hit the OFF button and let the pressure release naturally.

When complete, open the cover and tilt so that the steam comes out the back and away from your face. 

Add the applesauce, cayenne pepper, and 3/4 teaspoon of thyme and, using an immersion blender, blend until smooth. 


Stir in the lemon juice and adjust salt and cayenne to taste. It should still be warm enough but if not, use the SAUTE function and heat for several minutes. 

Pour into large cups or small soup bowls, top with the remaining fresh thyme and serve. 

Directions (On the Stove Top)
Heat the oil in a soup pot on medium heat. Add the onions and celery and cook for several minutes, stirring frequently. 

Add the diced butternut squash, broth, and salt and bring to a boil. Lower the heat and simmer, covered, until the squash is soft, about 15 to 20 minutes.

Turn off the heat. Add the applesauce, cayenne pepper, and 3/4 teaspoon of thyme and, using an immersion blender, blend until smooth. 

Stir in the lemon juice and adjust salt and cayenne to taste.

Pour into large cups or small soup bowls, top with the remaining fresh thyme and serve.  

Nutrition
Per serving: 117 calories, 3 g total fat, 1 g saturated fat, 0 mg cholesterol, 58 mg omega-3 and 263 mg omega-6 fatty acids, 2 g protein, 23 g carbohydrates, 4 g dietary fiber, and 551 mg sodium.

Tuesday, November 08, 2016

Make Your Holiday Baking Healthier - How To Convert Butter To Olive Oil In Recipes

Olive oil is a healthy substitute for butter in
holiday baking - Here's why!

Follow Foods For Long Life on Facebook and Pinterest.
Check out my eBook, Health Begins in the Kitchen.

Holiday Baking
Before you start baking holiday goodies for your family, friends, and neighbors, consider substituting some or all of that butter with extra virgin olive oil. Here's why!

First of all, it takes less olive oil than butter.  Here's how it converts:

Butter              Oil
1 tsp       =      3/4 tsp
1 TB               2 1/4 tsp
2 TB               1 1/2 TB
1/4 C              3 TB
1/3 C             1/4 C
1/2 C              1/4 C + 2 TB
2/3 C              1/2 C
3/4 C              1/2 C + 1 TB
1 C                 3/4 C

For example, if your recipe calls for 1/2 cup of butter , you would only need 6 tablespoons of olive oil. Nutritionally, this means:
* you would save 100 calories, 
* the recipe would have 47 fewer grams of saturated fat,
* you would save 244 mg of cholesterol,
* the baked item with olive oil would have 260 mg more beneficial omega-3 and 4,811 mg more omega-6 fatty acids.

In addition, olive oil contains anti-inflammatory polyphenols which lower the body's overall inflammation.  So give it a try!

Can't Give it Up?
If you absolutely cannot give up that buttery flavor, try using some ghee. Ghee is traditionally used in Indian food and is made by cooking butter until all the moisture is removed and the milk solids are caramelized and filtered out. Ghee has many advantages over butter.

Although it's not vegan, people like myself who cannot eat dairy, can tolerate ghee because  it does not have lactose or the milk protein, casein. It also doesn't spoil and can last for several months without refrigeration, so it's nice and soft when you need it. 

Always buy organic ghee made from
grass-fed and pasture-raised cows

But despite the numerous health claims you may read about ghee, it is still a saturated fat so if you do eat it, do it sparingly. 

It's amazing how very little butter or ghee it takes to bring a buttery taste to your recipe. So if you don't want to replace all of your butter with olive oil, convert most of it and add just a little ghee.

Happy Baking!


Wednesday, November 02, 2016

Whole Wheat Apple Blueberry Muffins With Walnuts - High In Omega 3

These warm, whole grain muffins make a healthy, fall breakfast.

Follow Foods For Long Life on Facebook and Pinterest.
Download my eBook, Health Begins in the Kitchen.

Warm Muffins - A Wholesome Addition to Breakfast
As the weather cools down, it's nice to start the day with a warm breakfast. These muffins, bursting with blueberries, apples and walnuts, are delicious with Kite Hill almond-based cream "cheese." Take the leftovers to work or school, as they make a wonderful mid-afternoon snack.

Blueberries are one of the highest antioxidant foods we can eat plus each low-calorie, high-fiber muffin is packed with over a 1/2 gram of omega-3 due to the addition of walnuts and flaxseeds!

                    *                             *                             *

Whole Wheat Apple Blueberry Muffins
Vegan, Dairy Free
[makes 12 muffins]

Ingredients
1/4 cup extra virgin olive oil plus more for greasing muffin pan
2 cups King Arthur white whole-wheat flour
2 tablespoons ground flax seeds
1/4 cup organic can sugar
1 teaspoon powdered stevia
1 tablespoon aluminum-free baking powder
1/2 teaspoon salt
1 cup non-dairy milk, such as almond or soy milk
2/3 cup applesauce
1/2 cup fresh or frozen blueberries, thawed
3/4 cup finely diced peeled apples
1/4 cup chopped walnuts

Directions
Preheat the oven to 375°F. Grease 12 muffin cups or line with paper liners. 

In a medium bowl, combine the flour, flax seeds, sugar, stevia, baking powder, and salt. 

In a large bowl, combine the milk, applesauce, and oil and beat well. 

Add the flour mixture to the large bowl and mix until well blended. Fold in the blueberries, apples and walnuts. 


Using an ice cream scoop or 1⁄3-cup measure, scoop batter into muffin tins. Bake until a toothpick comes out clean when inserted in the center of a muffin, 18 to 20 minutes. 


Remove from the oven, cool on a wire rack for 5 minutes, release the muffins from the pan, and serve warm. 


Warm muffins bursting with apples and blueberries.

Nutrition
Per muffin: 162 calories, 7 g total fat, 1 g saturated fat, 0 mg cholesterol, 538 mg omega-3 and 1,600 mg omega-6 fatty acids, 3 g protein, 20 g carbohydrates, 3 g dietary fiber and 202 mg sodium.


Wednesday, October 26, 2016

Dehydrating Serrano (Hidalgo) Peppers

Dried Serrano peppers will spice up your winter recipes!

Follow Foods For Long Life on Facebook and Pinterest.
Preview my eBook, Health Begins in the Kitchen.

End of Season Harvests
I'm just wrapping up the summer gardening season. The peppers and eggplant are done producing, the rains are coming, and in about a week, I'll finally be finished canning, freezing and dehydrating - hooray! 

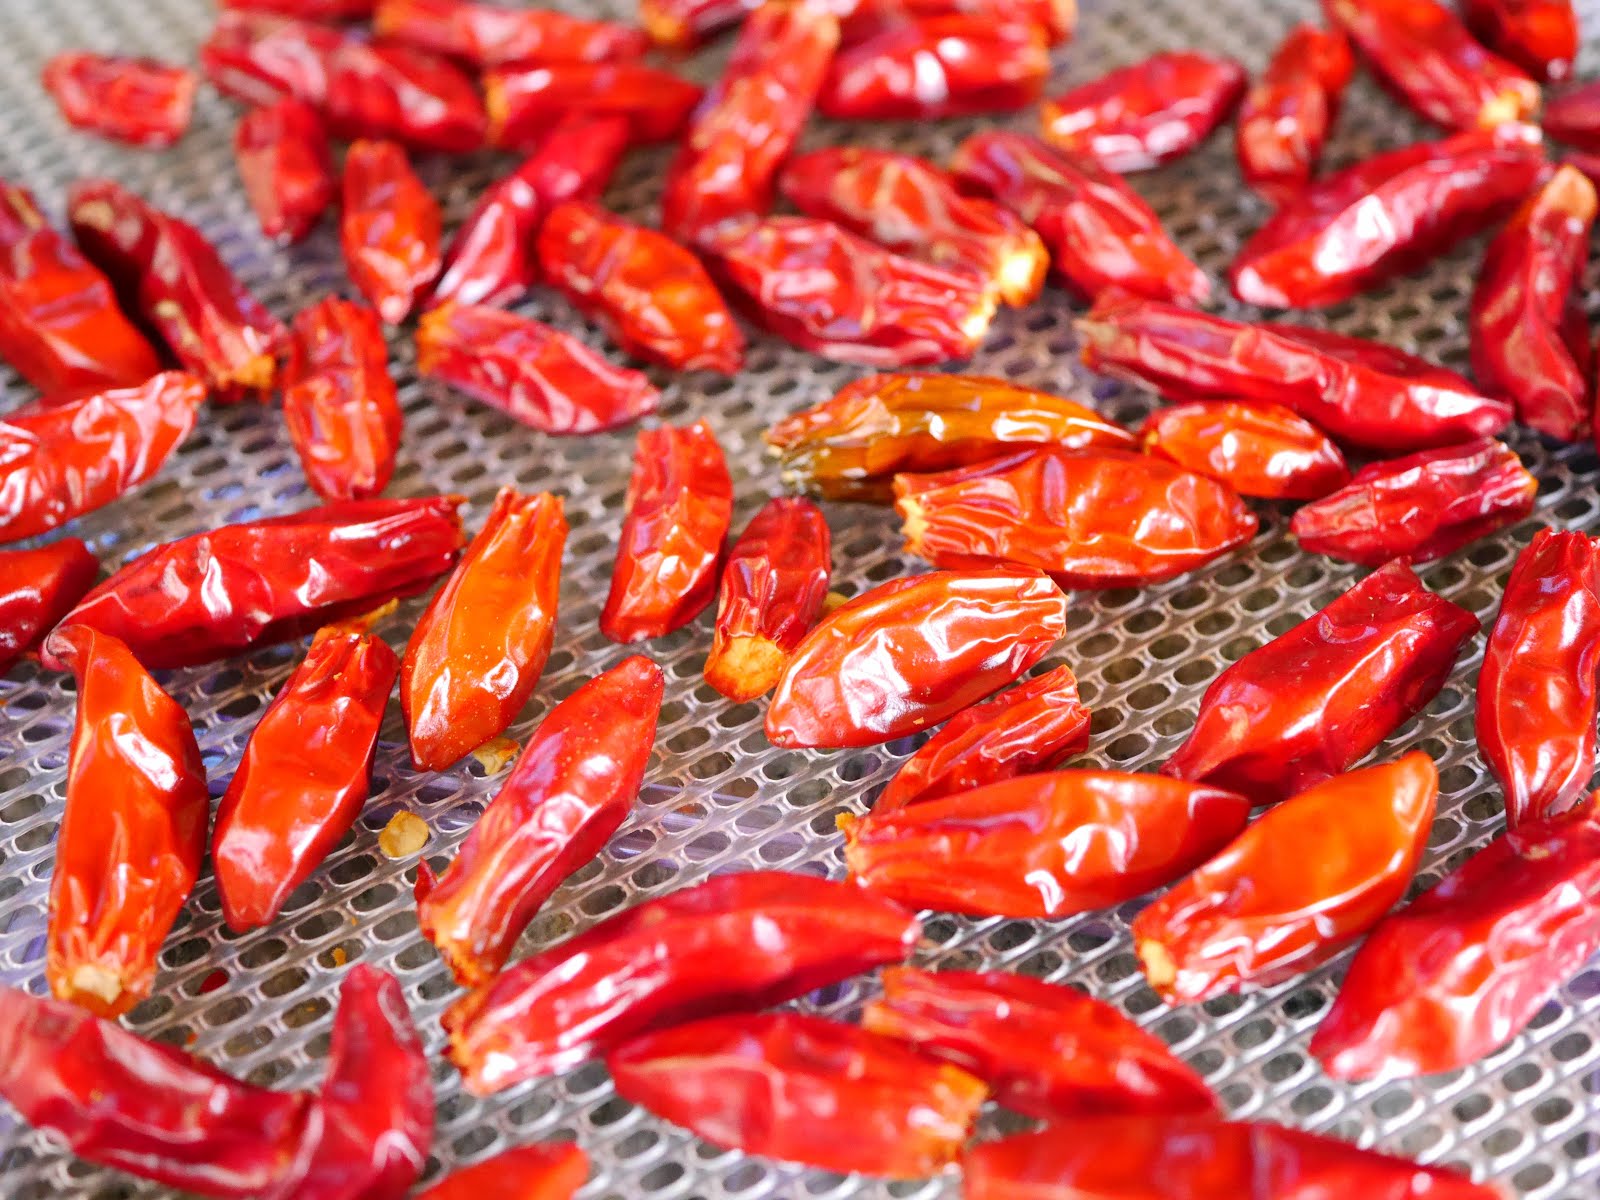
I grew a single Serrano pepper plant and while it was growing, I only pulled a few green peppers from it to cook with. So by the time it was ready to harvest, it had almost two pounds of beautiful ripe, red peppers varying in size from one to two inches. 


This is probably a life-time's worth of Serrano peppers, but I will dehydrate all of them and give them to whomever wants to spice up their life a bit! Last year I used them to make a lot of hot sauce, some of which I still have. It lasts a very long time in the refrigerator! Here's a recipe for Hot Sauce using Jalapeños and Serrano Peppers. 

Serrano peppers, also known as Hidalgo peppers, are spicier than jalapeños but not as spicy as habaneros. To find out how hot your favorite pepper is, check out this Pepper Scale.

Dehydrators
I have enjoyed my Excalibur Dehydrator. When I first bought it, I wondered if I'd ever use it, but I use it all the time. Besides drying fruit and vegetables, I use it to make crackers, fruit leather, and other things. There are many other brands on the market that vary in size and price so pick one that suits your needs.


Dehydrating Serrano Peppers
Place the peppers in a colander and wash them well. Wrap them in a kitchen towel and dry completely.

Wash in a colander

Wearing plastic gloves, cut the tops off of each pepper. I sliced the larger serranos in half and left the smaller ones whole but if I had to do it over, I would slice them all as it took two days to dry the whole ones. 

Place them on the woven dehydrator sheets without the non-stick solid teflon sheets so that the peppers get maximum air flow. Place the sliced peppers with the seeds facing up so they don't all fall out in your dehydrator.

Sliced peppers

Whole peppers

Put the dehydrator in a well ventilated room and open the window so the fumes don't get overwhelming. 

Place the sheets in the dehydrator and set the temperature to 125 to 135 degrees.  The sliced ones will be ready in about 10 hours but may take longer. The whole peppers may take a day or more. Make sure they are fully dried so they will not mold when storing.

Dried, sliced peppers

Put the dried peppers in glass jars and store in a cool, dry place.


To cook with the dried peppers, crumble them soups or stir fries. To make cayenne-like pepper, you can grind the dried peppers in a spice grinder and sprinkle on food. However you use these spicy little guys, they can boost your metabolism and help you burn more calories!


Tuesday, October 18, 2016

Instant Pot Farro With Peas

Farro, is an ancient strain of hard wheat.

Follow Foods For Long Life on Facebook and Pinterest.
Preview my eBook, Health Begins in the Kitchen.

An Easy Side Dish
I was preparing an eggplant and tofu stir fry for friends and was just about to cook some rice to go with it when I decided to make something different. I looked in the pantry and found a nice bag of pearled Italian farro. Farro, also known as emmer wheat, is not gluten free, but it is high in fiber, a good source of protein, magnesium and B vitamins. It's similar to barley and has a nice bite and texture.


1/4 cup dry farro provides:
170 calories
1 g total fat - 0 saturated
3 g dietary fiber
32 g carbohydrates
7 g protein

Here's a simple farro recipe using your instant pot. Serve with a stir fry, ratatouille, steamed vegetables, or tomato sauce.


                 *                        *                          *

Instant Pot Farro with Peas
Vegan, Dairy Free
[makes 8 servings]

Requirements
Instant Pot Electric Pressure Cooker

Ingredients
1 tablespoon extra virgin olive oil
1 cup diced onion
1 cup diced celery
1 1/2 cups pearled farro
2 1/2 to 2 3/4 cups vegetable broth
1/2 teaspoon salt, or to taste
1/4 teaspoon black pepper, or to taste
1 1/2 cups frozen peas, thawed, room temperature
1/4 cup chopped fresh parsley

Directions
Using the Sauté feature of the Instant Pot, heat the oil. Add the onion and celery and cook for 3 minutes, stirring frequently.


 Stir in the farro and then the broth, salt, and pepper.


Hit the Manual button and set for 7 minutes. When it is done, hit the Off button and let the pressure release naturally.

After the pressure comes down, carefully open the cover and stir in the room-temperature peas.


Close the cover and let sit for 5 minutes until the peas warm. If the mixture is still watery, just close the lid for a while longer until it absorbs.

Stir in the fresh parsley, adjust seasoning if needed, and serve immediately.


Nutrition
Per Serving (8): 177 calories, 3 g total fat, 1 g saturated fat, 0 mg cholesterol, 7 g protein, 30 g carbohydrates, 4 g dietary fiber, and 448 mg sodium.

Tuesday, October 11, 2016

Basil Tomato Soup With Corn & Cavatelli Pasta
Freeze A Big Batch For Winter

Yellow tomatoes make a delightful soup.

Follow Foods For Long Life on Facebook and Pinterest.
Check out my eBook, Health Begins in the Kitchen.

Yellow Tomatoes
I picked up a yellow tomato plant at the farmer's market this spring. Unfortunately I don't remember the name of the strain, but it grew the biggest, most beautiful, low-acid, tomatoes I've ever experienced. Some of them were a pound and a half! I am definitely going to save its seeds so that I can grow them again next year. Since they are late producers, I'm still harvesting them, even though it's early October.


Since I've already canned dozens of jars of red tomatoes, I thought I'd make and freeze lots of soup so that we could enjoy it this winter. (If you are going to freeze this soup, do so without the corn or pasta. It will take up less freezer space and you can add the corn and cooked pasta when you use it.) It's also a very versatile soup so add any veggies and grain you desire. Or for protein, add some beans or peas. The combinations are endless. This may become one of your favorite soups - it's certainly becoming one of mine.

I developed this recipe using a combination of yellow tomatoes and pink brandywines that are also late producers and are low in acid. You can make this soup with any tomato, but it's best when you use ones that are pulpy, not watery.

Heirloom yellow and pink brandywine tomatoes


        *                               *                                   *

Basil Tomato Soup
Vegan, Dairy Free, Gluten Free with gluten-free pasta
[makes about 8 cups]

Requirements
Hand Immersion Blender

Ingredients
1 tablespoon extra virgin olive oil
1 1/2 cups diced onion
1/2 cup chopped red bell pepper
4 cloves garlic, minced
1/2 pound new potatoes, peeled and chopped
2 carrots, peeled and sliced
4 to 5 pounds tomatoes, quartered (8 cups)
4 cups vegetable broth
1 bay leaf
1/2 teaspoon salt, or to taste
1/4 teaspoon black pepper, or to taste
2 tablespoons lemon juice, as needed
1/4 cup thinly sliced fresh basil
1 1/2 cups corn kernels (if frozen, thaw)
4 ounces dry pasta or more (cavatelli or shells)


Directions
Add oil to a large soup pot. Cook the onion and red bell pepper on medium-low heat until they begin to soften, about 5 minutes. 

Stir in the garlic and cook until fragrant, about a minute. Stir in the potatoes, carrots, tomatoes, broth, bay leaf, salt and pepper.


Bring to a boil, reduce heat and simmer until the vegetables are soft and the tomatoes are falling apart. I do not remove the skin or seeds because the immersion blender crushes them up pretty well, but if you want, you can pull out the skins with a long fork during the time it's simmering.

While the soup is simmering, prepare pasta according to directions. Drain and set aside.

Remove the bay leaf. Using an immersion blender, blend the soup until smooth. I prefer an immersion blender rather than a high speed blender, because the immersion blender leaves the soup thicker. If you have to use a blender, don't over process.

Blend until smooth with an immersion blender

Adjust salt and pepper and add lemon juice until it reaches the desired acidity. Stir in the fresh basil.

If you are going to freeze this soup for later, let cool and put in a freezer-safe jar. Allow room at the top as it will expand.

To serve, stir in the corn and cooked pasta. Top with additional fresh basil.


Enjoy!


Tuesday, October 04, 2016

How To Preserve Your Wine
How Much Wine Is Healthy?

How much wine should we drink?

Follow Foods For Long Life on Pinterest and Facebook.
Take a peek at Health Begins in the Kitchen.

Is Wine Healthy?
Over the years we've seen numerous headlines about drinking wine, and other forms of alcohol, for our health. If you're from an Italian family with grandparents who lived into their 80's or 90's, you'd say, "duh", but there's a lot more to this story than that. 

Benefits and Risks for the Heart
The benefits of drinking wine and other forms of alcohol are mostly for the heart. Studies have shown that drinking moderate amounts of alcohol:
* can reduce blood clots
* increases your good cholesterol, or HDL
* helps reduce your bad cholesterol, or LDL, which helps prevent damage to your arteries

Despite these benefits, the American Heart Association and National Heart, Lung, and Blood Institute do not recommend that you start drinking just for health reasons. But if you already drink, you should do so in moderation.

They define drinking "moderate" amounts of alcohol as:
* one drink a day for women of all ages
* one drink a day for men over 65
* up to two drinks a day for men age 65 and over

One drink is 5 ounces of wine, 1.5 ounces of distilled spirits, or 12 ounces of beer.

Drinking more than this can have a negative impact. It can:
* increase your triglycerides,
* raise your blood pressure
* lead to liver damage

What about Cancer?
Whereas alcohol has some heart health benefits, there is no evidence that it is helpful in the prevention of cancer. In fact, the more alcohol a person drinks, the higher that person's risk of getting cancer is. The American Cancer Society also advises people to limit their alcohol consumption to one to two drinks a day, as described above.

The ACS also warns:
* oral, esophageal, laryngeal, and pharyngeal cancers are more common in alcohol users than in non-alcohol users, especially if they also smoke.
* alcohol is a major cause of liver cancer
* women who have 2 to 5 drinks a day have a higher risk of breast cancer
* heavy alcohol users have a higher risk of colon and rectal cancer.

A Trick to Preserve Wine and Limit Consumption
When you open a bottle of wine, several things happen, besides overwhelming feelings of joy and anticipation. You drink a glass, your judgement goes to hell, and the wine starts to oxidize. So here's what Doug and I started doing.

#1 - Buy a half bottle of wine with a screw top. Drink it and save the bottle.

We found a nice half bottle Sauvignon Blanc with a screw top.

#2 - The next time you want open a normal size bottle of wine, pour half of it in the empty half bottle. Pour it up to the top and screw the top back on. This will prevent oxidation so the wine will keep. It will also discourage you from drinking the rest of the bottle after your judgement weakens so you may have to hide it :-)

We opened a bottle of our Turtle Vines Pinot Noir
Poured half into our empty 1/2-bottle
After filling completely, leaving no air space,
screwed it shut
Then we drank the rest of the opened bottle

A bottle of wine is 750 ml or 25 ounces. So a half bottle provides one 5-ounce pour and one 7.5-ounce pour which meets the guidelines for a woman and a man. I'm supposed to drink the small one but as you can see from the above picture, we didn't quite pour it that way. The 2012 Pinot is my favorite vintage, so I was weak! But usually, I give Doug the bigger pour.

Cheers!


Wednesday, September 28, 2016

Make Your Own Italian Eggplant Caponata
Still Looking For Progresso Caponata?

Eggplant Caponata makes a great appetizer.

Follow Foods For Long Life on Facebook and Pinterest.
Preview my eBook, Health Begins in the Kitchen.

Childhood Memories
Pretty much every holiday dinner in my family started with an antipasto. Occasionally, part of the antipasto was eggplant caponata. Even though my family made most things from scratch, the eggplant caponata was made by Progresso. 

Most prepared foods that come in cans is terrible. But I will tell you, those tiny little cans of Progresso Eggplant Caponata were wonderful, but unfortunately they are no longer available.

I hadn't eaten caponata for years. But last year, my girlfriend Margarite made a huge jar  for me. It immediately brought back childhood memories of this tasty dish. I devoured the entire jar and immediately planted eggplant in my garden.

My sister-in-law Dianne has fond memories of her aunt Vera's caponata and recently shared that recipe with me. There are things I like from Margarite's recipe and things I like from aunt Vera's. So I made a trial batch using the best of both recipes and it came out great!


Eggplant from my garden

Too Much Oil
The only unhealthy thing about caponata is the copious amounts of olive oil used in most recipes. Aunt Vera's recipe calls for 1 1/2 cups and Margarite's uses 1 cup. My brother Peter gave me a tip about microwaving the eggplant before frying that significantly reduces the amount of oil needed. Although I rarely use a microwave for anything other than heating up leftovers, I think this trick works very well and it allows me to reduce the amount of oil to less than 1/2 a cup. That still sounds like a lot but this recipe fills a 1 liter jar, lasts for a very long time in the refrigerator, and is used sparingly on crackers or baguette slices.

                    *                                    *                                    *

Eggplant Caponata Appetizer
Vegan, Dairy and Gluten Free
[Fills a 1 liter jar]

Ingredients
2 large or 3 medium eggplants
7 tablespoons extra virgin olive oil, divided
2 cups diced onion
4 stalks celery, diced
1 small red bell pepper, diced (~1/2 cup)
4 cloves garlic, minced
1/2 cup chopped pimento stuffed green olives
1/2 cup drained capers 
1 tablespoon pine nuts or walnuts, finely chopped
1 teaspoon salt
3/4 teaspoon black pepper
2 tablespoons sugar
1 (15-ounce) can tomato sauce 
1/4 cup water or as needed
1/2 cup red wine vinegar

Directions
Peel the eggplants, leaving on some of the peel. Cut into 1-inch cubes and place, in a single layer, on a microwavable plate covered with two layers of paper towels (you will have to do this in two batches.) Cover with a single layer of paper towels and cook in the microwave on high for 7 minutes. 

Microwave for 7 minutes

Heat 4 tablespoons of olive oil in a large enamel coated, non-stick skillet. Sauté the eggplant on moderate heat, turning occasionally, until tender and browned on all sides. Remove the eggplant from the skillet and set aside.

Add 2 tablespoons of olive oil to the skillet. Add the onions, celery, and bell pepper and cook on moderate heat until tender and golden brown, about 15 minutes. 


Add garlic, olives, capers, nuts, salt, pepper and sugar and cook, stirring, for several minutes. Stir in the tomato sauce and vinegar.


Stir in the cooked eggplant and cook, covered, until tender. Add a 1/4 cup or more of water if needed.


When the eggplant is tender, remove the cover and cook a few minutes until the water is completely evaporated. Stir in 1 more tablespoon of olive oil, and adjust salt and pepper to taste.

Cover and let the caponata sit in the pan for several hours to allow the flavors to develop.

Place in a 1-liter, air-tight jar and refrigerate until needed. 


Caponata will last for weeks in the refrigerator.

Serve at room temperature on gluten-free crackers or baguette slices.